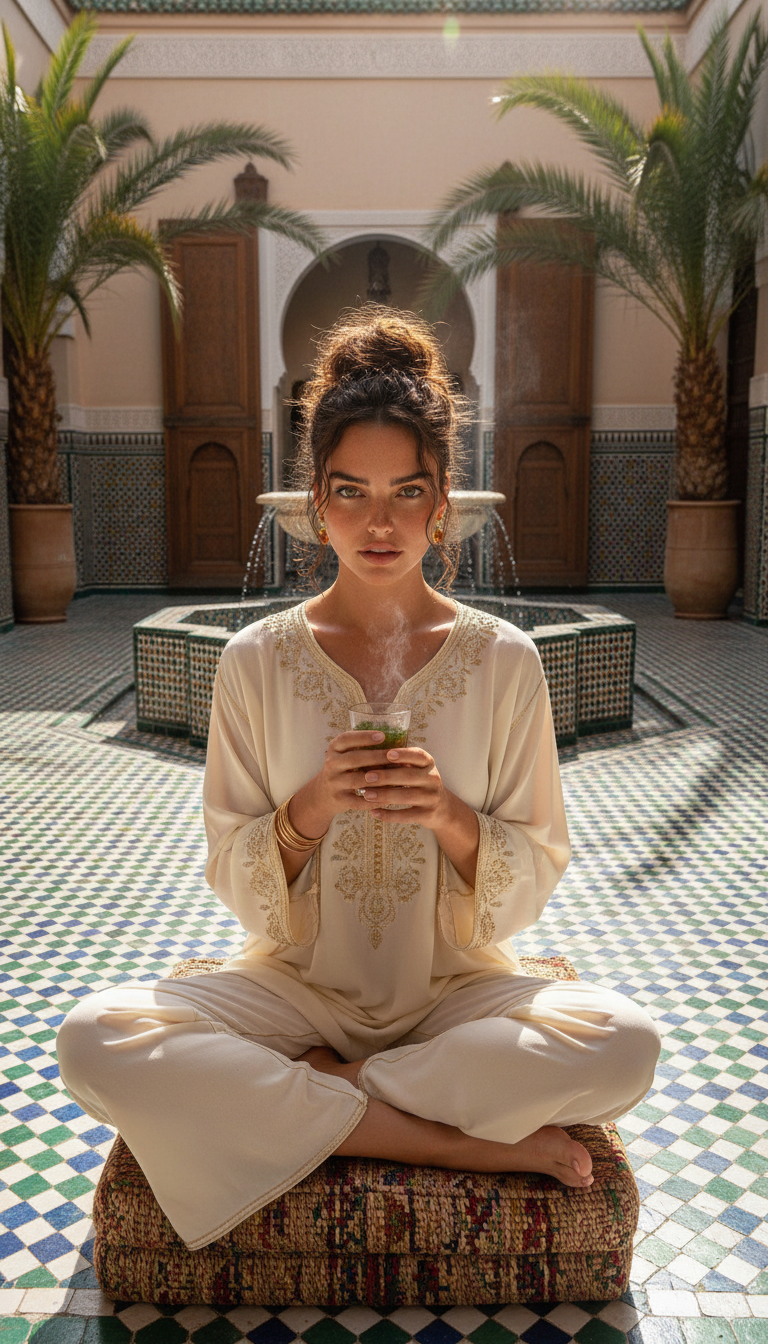
Marrakech Riad Morning

Marrakech Riad Morning

ai-image-editor

1 clip
1 uses

Any aspect ratio

Prompt

Subject sitting cross-legged on woven cushions in a traditional Marrakech riad courtyard, holding a small glass of mint tea with steam rising. Wearing a loose ivory kaftan with gold embroidery, gold bangles, and amber stud earrings. Dark curly hair in a high loose bun with soft strands framing the face. Surrounded by blue and green geometric tiles, a central marble fountain, and potted palms casting dappled shadows. Warm morning light streaming from above. Shot from across the courtyard at a slight downward angle, rich patterns leading toward the subject, calm and intimate atmosphere.

AI Image Editor Template: Turn Any Image Into High-Impact Creative in Minutes

Use this template to rapidly transform existing images into polished, on-brand creatives with the AI Image Editor. It’s built for fast iteration: swap backgrounds, remove objects, enhance faces, or repurpose a single asset into multiple formats without opening Photoshop or briefing a designer.


What This Template Is For

This template is ideal if you need to:

  • Clean up or retouch photos (portraits, product shots, UGC, thumbnails)
  • Remove or replace distracting backgrounds and objects
  • Localize or adapt one visual for different platforms and audiences
  • Turn rough concepts into production-ready assets your team can ship
  • Quickly test creative variants for ads, landing pages, and social content

It’s especially useful for:

  • Performance marketers testing many creative variants
  • Founders and growth teams without a full design stack
  • Developers building content workflows or internal tools
  • Content and social teams repurposing existing assets at scale

How to Remix This Template in Magic Hour

You can recreate and customize this template in a few minutes. Here’s a simple, repeatable workflow:

  1. Open the AI Image Editor
    Go to the AI Image Editor. This is the core tool used for this template.

  2. Upload or select a base image

    • Use a product shot, portrait, logo, illustration, or any brand asset.
    • If you don’t have a starting image, generate one first with the AI Image Generator or AI Photo Generator, then bring it into the editor.
  3. Decide your transformation goal
    Common use cases for this template:

    • Clean product photo on a neutral or branded background
    • Professional headshot from a casual photo (paired with the AI Headshot Generator)
    • Social ad creative with the background swapped or simplified
    • Thumbnail-style image with distractions removed
    • Enhanced, sharpened version of a low-res or older image
  4. Edit the image with AI tools
    Inside the editor, you can:

  5. Create reusable variants
    Once you have one strong edit, you can quickly derive:

  6. Save your process as a template pattern
    While Magic Hour doesn’t expose “template settings” directly, you can:

    • Save your favorite edited images as reference styles for future projects.
    • Keep a small internal playbook: which base image types you use, which tools you combine, and what output formats your team needs.
    • Use the same workflow repeatedly, only swapping in new inputs (image + goal).

Advanced Remix Ideas for Power Users

If you’re building more complex workflows or want to turn this into part of a content system:


Combine With Other Magic Hour Templates and Tools

This AI Image Editor template becomes more powerful when you pair it with other Magic Hour creation flows:

  • Face Swap Video

    • Use Face Swap Video to generate dynamic face-swapped content.
    • Grab still frames and refine them in the AI Image Editor for thumbnails, covers, and social cutdowns.
  • Lip Sync & Talking Photos

    • Turn edited portraits into talking avatars with:
    • Use the editor to ensure the face is clean, high-res, and on-brand before animating.
  • Video-to-Video and Animation

    • Prepare clean character or style frames in the AI Image Editor.
    • Feed them into:
  • Restoration and enhancement flows


Practical Tips for Better Results

  • Start with the highest quality source you have
    Higher-resolution inputs usually yield better AI edits. If needed, upscale first with the AI Image Upscaler.

  • Define a clear intent per edit
    Decide: are you cleaning, stylizing, localizing, or experimenting? Keeping a single goal per pass makes results more predictable.

  • Think in systems, not one-offs
    Once you find a combination of:

    • Input type (portrait/product/illustration),
    • Editing pattern (background removal + enhancement, or stylization + cleanup),
    • Output use case (ad creative, thumbnail, avatar), document it. That becomes your internal “remix recipe” that any teammate can follow.
  • Chain tools intentionally
    Example high-value chains:

    • Headshot: raw selfie → AI Image Editor cleanup → AI Headshot Generator → AI Image Editor for final polish.
    • Product ad: basic product photo → background removed → AI Background Generator for a branded scene → editor for fine-tuning and cropping.
    • Social character content: AI character creation → AI Image Editor pose/scene edits → AnimationThumbnail Maker for publishing assets.

Who This Template Is Best For

  • Creators and solo founders who need designer-quality assets without hiring a full-time designer.
  • Growth and marketing teams running continuous creative tests across channels.
  • Developers and product teams integrating AI imagery into internal tools, demos, or product UIs.
  • Agencies and studios who want a repeatable, documented workflow that junior team members can run reliably.

Next Steps

  1. Open the AI Image Editor.
  2. Upload a real asset from your current project (not a test file).
  3. Run through one full “edit pattern” (e.g., cleanup → background change → upscale).
  4. Save your before/after, share it with your team, and document the steps that worked.
  5. Treat that as your own remix of this template—and reuse it for every similar asset going forward.

More Like This

Insufficient credits