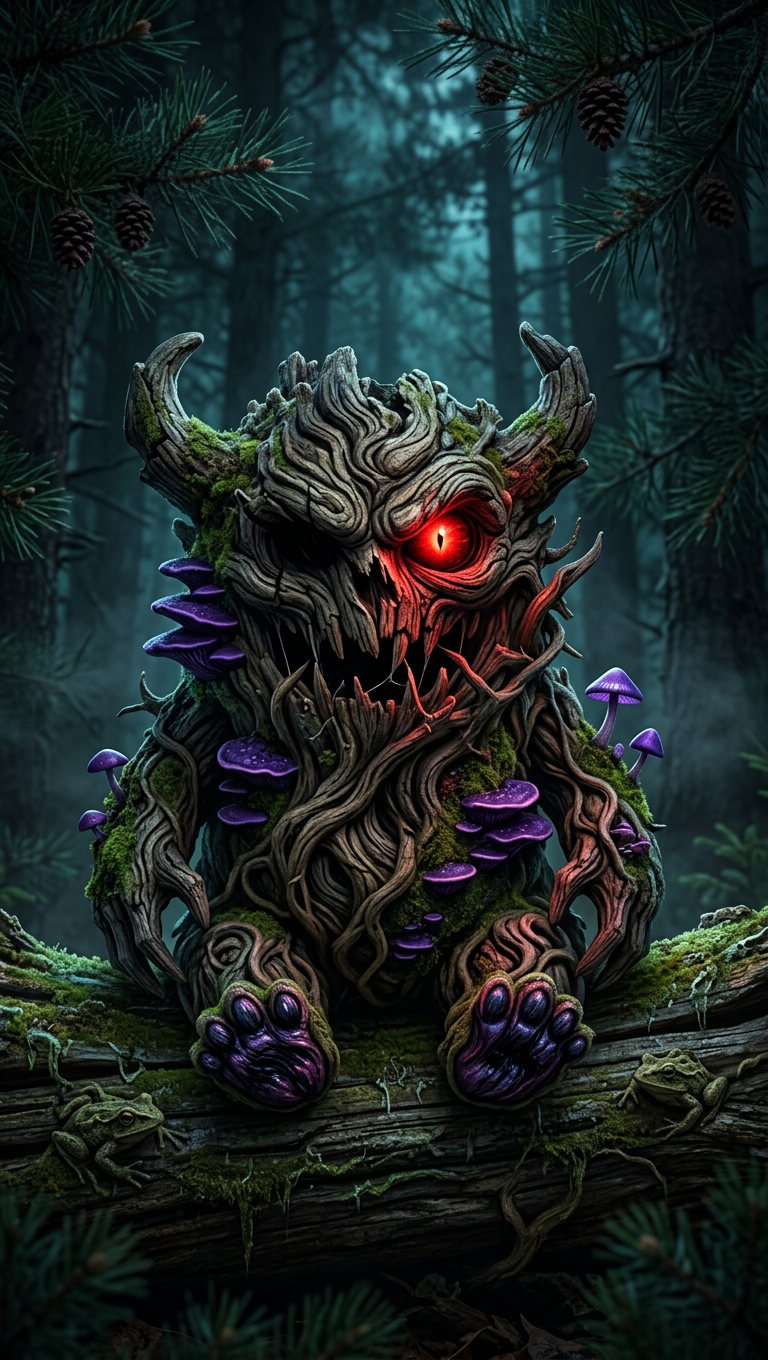
Crimson Eye Wood Entity
ai-image-editor
Any aspect ratio
A subject transformation: a terrifying wooden entity emerging within a dense pine forest, its body formed from gnarled wood and intricate organic textures. A single glowing red eye pierces through shadow, casting an eerie light onto surrounding foliage. Hyper-realistic detail reveals layered bark patterns, moss, and subtle natural decay. The entity blends seamlessly with the forest, evoking ancient folklore and quiet dread. Cinematic close-up with shallow depth of field, volumetric fog, dark atmospheric lighting. Ultra-detailed, photorealistic, 4K, eerie nature-horror aesthetic with subtle frogcore elements.
AI Image Editor Template: Turn Any Photo Into a Polished, On‑Brand Visual in Minutes
Use this template to quickly clean up, enhance, and transform photos with the AI Image Editor. It’s built for creators, marketers, and product teams who need high‑quality, ready‑to‑publish visuals without opening Photoshop.
What This Template Is Best For
This AI Image Editor template is ideal when you need to:
- Remove unwanted objects, distractions, or people from a shot
- Replace or blur busy backgrounds for cleaner compositions
- Fix small issues (blemishes, dust, logos, artifacts) before publishing
- Adapt a photo to a specific aesthetic (e.g., studio, cinematic, minimalist)
- Create multiple on‑brand variations of the same asset for A/B tests or campaigns
- Prepare images for use in ads, landing pages, pitch decks, or app UI
If you work in performance marketing, product design, social media, or content, this template is designed to get you from “rough source photo” to “final creative” in a few clicks.
How the Template Works in Magic Hour
This template is powered by the AI Image Editor, which lets you:
- Upload any image (product photos, headshots, screenshots, UGC, concept art, etc.)
- Edit visually with AI — select, erase, or describe what you want changed
- Generate clean, high‑resolution outputs ready for web, social, and print
- Iterate quickly by remixing your result into new variations
Behind the scenes, the editor uses diffusion‑based image models similar to those described in the original Stable Diffusion paper (Rombach et al., 2022) and inpainting techniques used in modern generative tools. In practice: you mark what you want changed, give a short instruction, and the model reconstructs those regions to match your request and the rest of the image.
Step‑by‑Step: Remix This Template Into Your Own
You don’t need to start from scratch. Here’s how to create your own version of this template inside Magic Hour:
Open AI Image Editor
Go to the AI Image Editor.Upload a “reference” image
Use a photo that represents the kind of edits you want to standardize — for example:- A product shot needing background cleanup
- A lifestyle photo with distracting objects
- A headshot that needs subtle retouching
Perform the core edit once
Use the editor to:- Remove objects (e.g., cables, clutter, signs)
- Replace or simplify backgrounds (e.g., solid color, subtle gradient, on‑brand texture)
- Clean up faces or skin (light, realistic adjustments only)
- Fix color balance, lighting, or composition using descriptive prompts
Document your “editing recipe”
The key to turning this into a reusable template is to make your workflow explicit:- What parts of the image do you typically adjust?
- How do you usually describe your desired style (e.g., “soft studio lighting, neutral background, e‑commerce ready”)?
- What should never change (e.g., product color, logo, layout)?
Save those notes; you’ll reuse them each time you remix.
Save and duplicate for future projects
Once you’re happy with the result:- Save the edited image as your “master” example
- Reuse it as a visual reference and re‑apply the same instructions to new inputs
Remix for new images
For each new photo:- Upload the new image to the AI Image Editor
- Apply the same “recipe” you used on your template (similar selections and prompts)
- Quickly generate variants to see which works best for your campaign or layout
Over time, this becomes your internal “AI editing system”: consistent inputs and consistent instructions produce reliably consistent brand visuals.
Advanced Workflows: Combine With Other Magic Hour Tools
For more complex pipelines, you can chain this template with other Magic Hour products:
Turn edited photos into short videos or loops
- Use Image to Video to create motion from your polished images (great for app previews, product hero animations, or subtle motion in landing pages).
- Convert clean static images into GIFs with the AI GIF Generator for ads, social posts, or email.
Create net‑new images if your source is weak
- Use the AI Image Generator or AI Photo Generator to create a base image in your style, then refine it with the AI Image Editor.
- For stylized visuals (anime, comics, manga), start with:
Fix quality and sharpness after editing
- Upscale and sharpen the final image for print or high‑density screens with the AI Image Upscaler.
- Repair blurred or low‑res inputs before editing using Unblur Image or restore legacy assets via Old Photo Restoration.
Remove unwanted elements at scale
- Use AI Remover or Remove Object from Photo when your primary edit is cleanup/removal. Then fine‑tune the result in the AI Image Editor.
Prepare high‑impact branded visuals
- Design covers and visuals directly with:
- Book Cover Generator
- Thumbnail Maker
- Album Cover Generator
- AI Logo Generator
Then refine details or correct small issues using this AI Image Editor template.
- Design covers and visuals directly with:
Create people‑centric creatives
- Generate or refine faces with AI Face Generator or AI Face Editor.
- For professional assets, use AI Headshot Generator and adjust background or lighting in the AI Image Editor.
- Experiment with Gender Swap or Face Swap for concepting, then polish the result here.
Common Use Cases for This Template
1. E‑commerce and SaaS marketing
- Clean up product photos for marketplaces, landing pages, and ads
- Standardize backgrounds across SKUs or feature screenshots
- Remove reflections, clutter, or branding conflicts from UGC shots
Helpful tools to pair with this template:
- AI Background Generator for on‑brand backdrops
- Image Background Remover to quickly isolate products before editing
- Thumbnail Maker to create polished video or YouTube thumbnails from your edited images
2. Personal branding and professional profiles
- Clean, subtle retouching for LinkedIn, team pages, speaker bios
- Standardized backgrounds for distributed teams’ headshots
- Prepare assets for AI Talking Photo or AI Voice Cloner videos
Complementary products:
- AI Selfie Generator for different looks
- AI Headshot Generator for professional variants
- Face Swap Video or Lip Sync to turn your refined headshots into dynamic content
3. Content, newsletters, and social media
- Quickly turn raw screenshots and photos into shareable assets
- Remove watermarks from your own archived content using Watermark Remover, then refine with this template
- Generate on‑brand illustrations via AI Illustration Generator, then tweak them in the Image Editor
For high‑engagement content, many teams also use:
- AI Meme Generator
- AI QR Code Generator (e.g., QR codes embedded in edited images for campaigns)
Tips for Better Results
Start with the best source you have
Even though the AI can fix a lot, sharper and better‑lit inputs produce more realistic edits. If you’re working with older or damaged images, run them through Old Photo Restoration and Unblur Image first.Use clear, concrete instructions
Instead of “make this nicer,” try:- “Remove all logos on the table and replace with a plain white surface.”
- “Change the background to a soft, neutral studio backdrop suitable for a product page.”
- “Subtle skin retouching only, keep natural texture.”
Protect brand‑critical details
If color accuracy or layout matters (e.g., product color, logo placement, UI screenshots), avoid asking the model to “redesign” those elements. Focus instructions on environment, background, and minor cleanups.Create a style guide once, then reuse
Many teams maintain a small internal document with:- Example images that “look right”
- A few standard prompt phrases that define their house style
- Cases where AI edits are not allowed (e.g., legal or compliance constraints)
Use this guide whenever you remix this template, so your visuals remain consistent across campaigns.
Turning Edited Images Into Video and Interactive Assets
Once you’ve polished your images with this template, you can extend them into richer formats:
Short, on‑brand videos
- Use Text to Video to generate scenes based on your campaign copy, using your edited images as reference.
- Convert static images into motion clips with Image to Video.
- Refine, restyle, or animate existing footage with Video to Video.
Animated or talking characters
- Turn your edited portraits into dynamic avatars with:
Better audio and captions
- Add voiceovers via AI Voice Generator or AI Voice Cloner.
- Generate captions or subtitles automatically with the Auto Subtitle Generator.
Why Use This Template Instead of Manual Editing
Research and industry benchmarks consistently show that high‑quality visuals can significantly improve conversion rates, ad performance, and user trust. But traditional workflows (Photoshop, outsourcing, agencies) can be slow and expensive, especially for fast‑moving teams.
Using this AI Image Editor template:
- Reduces manual, repetitive work (no more cloning out the same distractions 50 times)
- Keeps your visual language consistent across assets, channels, and campaigns
- Gives non‑designers leverage to produce design‑level outputs without complex tools
- Plugs into richer generative workflows across Magic Hour (image → video → voice → captions)
If you’re building a startup, running a lean marketing team, or iterating products quickly, this template is a pragmatic way to standardize high‑quality visuals with minimal overhead.
Remix This Template for Your Stack
To adapt this template to your own workflow:
- Define your core editing pattern (what you fix in almost every image).
- Implement that pattern once using the AI Image Editor.
- Document your “recipe” in simple language and reuse it for each new upload.
- Chain in other tools (like AI Image Upscaler, Image Background Remover, or Image to Video) as your needs grow.
This page’s template is just one reference implementation. The real value comes when you remix it around your own brand, constraints, and pipelines.