Best Ways to Get Started with ComfyUI: A Comparative Beginner’s Guide


If you have been following the rise of AI image generation, you know the landscape looks very different from what it did just a couple of years ago. Among the many tools, ComfyUI has become a favorite for creators who want both fine-grained control and the ability to build complex pipelines. Unlike one-click apps, ComfyUI is node-based - you connect blocks together like Lego to decide exactly how your image is created.
For newcomers that can feel exciting and intimidating at the same time. The first time you open ComfyUI, the canvas fills with nodes and connecting wires and the interface can look like the cockpit of a jet. But once you learn the basic flow, ComfyUI becomes one of the most reliable and flexible tools in your creative toolkit.
This guide gives you a practical starting point. We compare ways to run ComfyUI, explain tradeoffs between local and cloud, and provide a long, clear, step-by-step walkthrough that covers everything from launching ComfyUI to creating your first high-quality image. I also share tips I learned from real-world testing on local GPUs and cloud instances, plus troubleshooting and advanced techniques you’ll use as you level up.
Getting started with ComfyUI at a glance
Method | Best for | Key features | Platforms | Free option | Starting cost |
Local installation | Users with NVIDIA GPUs | Full control, offline use, customizable workflows | Windows, Linux, macOS | Yes (software) | Hardware dependent |
Cloud server | Beginners, light users | Pre-installed manager and models, hourly billing | Browser-based | Sometimes limited | ~$0.60-$1.20/hr (varies) |
Hybrid | Power users, teams | Local editing + cloud rendering | Cross-platform | Partial | Varies |
What is ComfyUI?
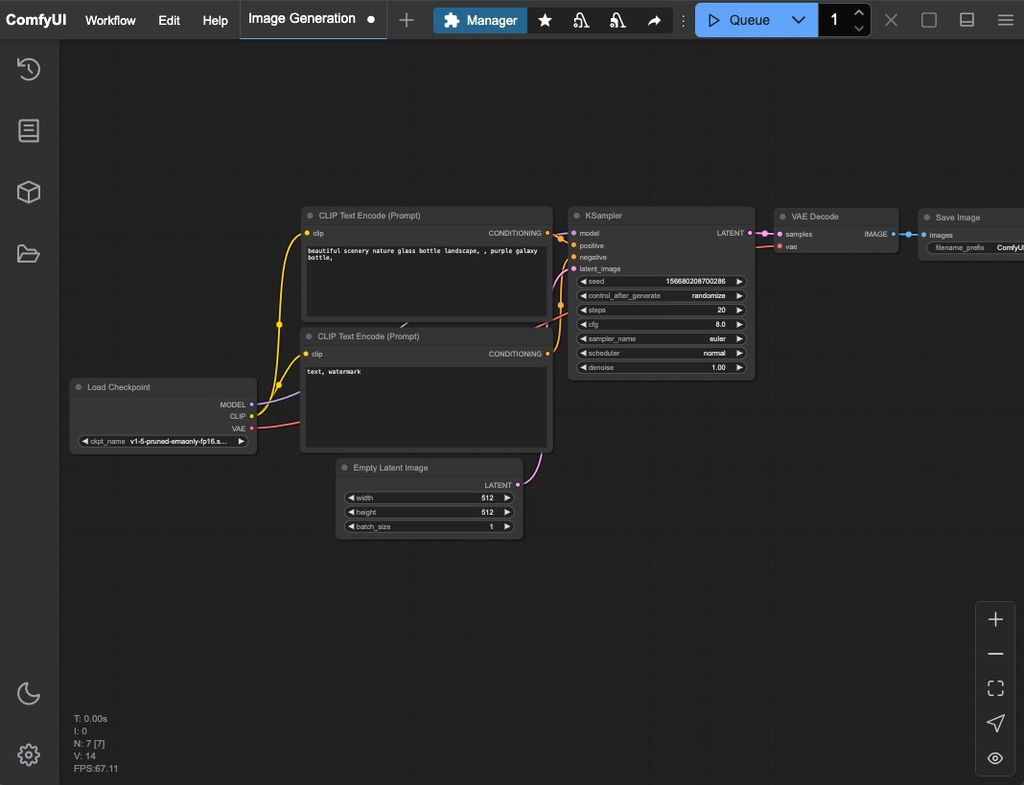
ComfyUI is an open-source, node-based interface for AI image generation. Where many UIs present a few controls and a single prompt field, ComfyUI exposes the internal building blocks: checkpoint loaders, prompt nodes, samplers, conditioning, LoRAs, ControlNet, upscalers and more. You visually assemble a pipeline that defines how your input moves through models and transforms into an output image.
The benefits:
- Fine-grained control for advanced workflows: multi-step edits, chained samplers, conditional nodes.
- Reproducibility: workflows can be saved as JSON so others can reproduce your steps.
- Extensibility: community plugins and custom nodes let you automate unusual pipelines.
The downside:
- A steeper learning curve for beginners compared to simpler UIs.
- Requires some familiarity with models, checkpoints, and GPU constraints to get the best results.
If you want flexibility and are prepared to learn a bit of workflow design, ComfyUI scales from quick experiments to professional pipelines.
Deployment options - local vs cloud vs hybrid
Choosing how to run ComfyUI largely determines your day-to-day experience. Below I walk through the practical implications of each option and give concrete setup advice.
1) Local installation - full control if you have a GPU
Who should choose this:
- Developers, researchers, and creatives who already own a capable NVIDIA GPU and want offline privacy and maximum customization.
Requirements and expectations:
- NVIDIA GPU with at least 6 GB VRAM for basic use; 8-24+ GB for higher-res or larger models.
- Enough disk space for model checkpoints - a few GBs each, dozens of GB if you collect many models.
- Comfort with installing Python, managing dependencies, and running command-line commands if you do a manual install.
Basic local install steps (Windows):
- Install Python 3.10+ and ensure "Add Python to PATH" is checked during installation.
- Install Git from git-scm.com.
- Open a terminal (PowerShell) and run:
- git clone https://github.com/comfyanonymous/ComfyUI.git
- cd ComfyUI
- git clone https://github.com/comfyanonymous/ComfyUI.git
- Create and activate a virtual environment:
- python -m venv venv
- .\venv\Scripts\activate
- python -m venv venv
- Install Python dependencies:
- pip install -r requirements.txt
- pip install -r requirements.txt
- Launch ComfyUI:
- python main.py
- Open your browser to http://127.0.0.1:8188
- python main.py
Basic local install steps (Linux / macOS):
- Install Python 3.10+, Git, and appropriate CUDA drivers for your GPU.
- In a terminal:
- git clone https://github.com/comfyanonymous/ComfyUI.git
- cd ComfyUI
- python -m venv venv
- source venv/bin/activate
- pip install -r requirements.txt
- python main.py
- git clone https://github.com/comfyanonymous/ComfyUI.git
- Open http://127.0.0.1:8188 in your browser.
Notes and tips:
- Use the ComfyUI portable builds if you want to avoid manual installs. The portable build packages the environment and is a double-click run for Windows.
- Update drivers and CUDA toolkit when you upgrade GPUs. Mismatch between CUDA and drivers is a common source of errors.
- Keep model files organized and name them clearly. Use folders like models/checkpoints/, models/loras/, models/controlnet/.
Pros:
- Full control, no ongoing cloud fees.
- Great for private or offline projects.
- Fast iteration once optimized.
Cons:
- Setup friction for non-technical users.
- Hardware dependent and requires maintenance.
2) Cloud deployment - zero setup, scalable
Who should choose this:
- Beginners with no GPU, teams that need burst compute, or anyone who prefers not to manage hardware.
What to expect:
- Managed cloud images (for example the Gongji image mentioned earlier) that include ComfyUI Manager and popular models pre-installed.
- Pay-as-you-go hourly billing, choose GPU based on speed/cost tradeoff (RTX 3090, RTX 4090, H20, etc).
Typical cloud workflow:
- Sign into the cloud provider console (e.g., Gongji - console.suanli.cn/server).
- Create a new server using a ComfyUI pre-built image.
- Choose GPU type and instance size.
- Launch and click "Open in browser" to access ComfyUI.
Pros:
- Fast to start - minutes to working.
- Ideal for generating large batches, high-res renders, or video frames.
- No local GPU required.
Cons:
- Ongoing cost per hour, which can add up if left running.
- Data privacy depends on provider and configuration.
- Slight latency in transferring large assets or saving results.
Real-world note:
I used a cloud RTX 4090 instance for batch testing. A 1024x1024 render often completed in under 10 seconds. For short bursts of heavy generation this is more cost and time efficient than buying a top-tier GPU.
3) Hybrid approach - best of both worlds
Who should choose this:
- Teams and creators who prototype locally and render at scale in the cloud.
How it works in practice:
- Build and iterate workflows locally on your laptop or desktop (fast editing, no cloud cost for trial tweaks).
- For final high-resolution renders or large batches, export the workflow and run it on a cloud GPU instance.
- Sync input images and outputs via cloud storage (Drive, S3) to keep everything organized.
Pros:
- Lower cloud bills because you only use remote compute when necessary.
- Local convenience for design and debugging.
- Scales for production work.
Cons:
- Requires disciplined workflow management and syncing.
- Slightly more complex tooling and automation.
Step-by-step expanded - Create your first image with confidence
This is the heart of the guide. I expand the step-by-step process with exact actions, UI hints, and practical tips so you can follow along and succeed on your first try.
Stage 0 - Prerequisites and quick checklist
Before you begin, make sure you have:
- Access method - choose local, portable, or cloud.
- A modern browser (Chrome, Edge, Firefox).
- At least one model checkpoint (ComfyUI Manager can download it for you).
- Familiarity with basic prompt writing - not required but helpful.
Quick checklist:
- Local: Python installed, GPU drivers up to date, ComfyUI running at http://127.0.0.1:8188
- Cloud: instance running, ComfyUI page accessible via the server link
- Portable: run script executed and server started

Stage 1 - Launching ComfyUI
On cloud:
- Start the server from the control panel.
- Locate the ComfyUI URL - often it’s displayed in the console or server details.
- Open the URL in your browser. You may be prompted to accept a security warning if the instance uses a self-signed certificate - that’s normal for many quick cloud setups.
On local:
- Double-click the run script in the portable build or run python main.py in your environment.
- Watch the terminal logs. Look for a line that says "Server started at http://127.0.0.1:8188".
- Open that URL in your browser.
Pro tip:
- Bookmark the ComfyUI URL and pin it to your browser for quick access during an editing session.
Stage 2 - load a sample workflow
Why start with a sample:
- It shows a working pipeline, so you can focus on prompts and model behavior instead of building nodes from scratch.
Steps:
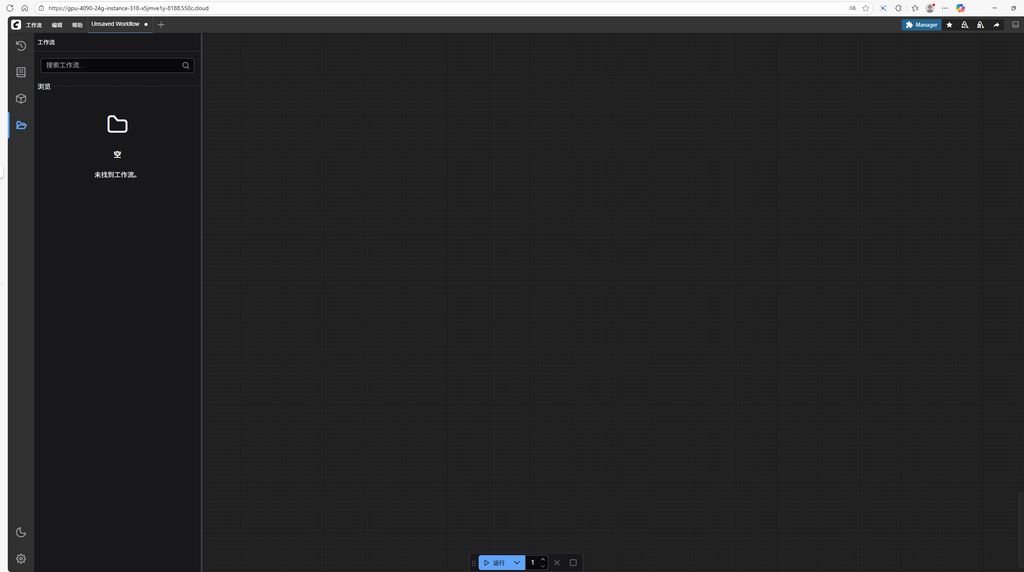
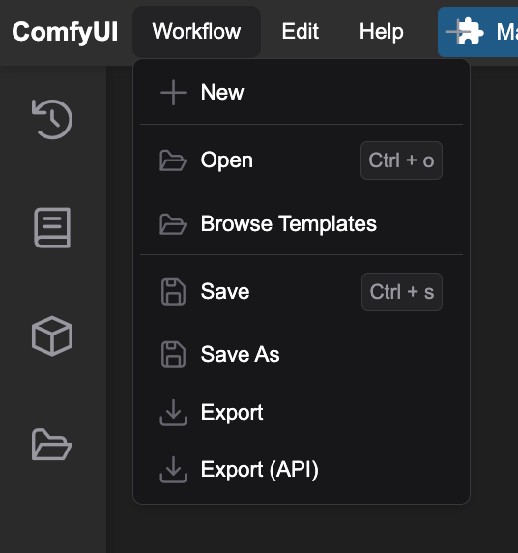
- In the left sidebar of ComfyUI, find the workflows icon (folder icon).
- Click "Browse sample workflows" or open the built-in workflow folder.
- Select "Basic Text-to-Image" or "Simple Image Generation".
- The canvas populates with nodes: Checkpoint Loader, Positive Prompt, Negative Prompt, Sampler, Output.
- Click Fit View (or press F) so the entire graph is visible.
- Hover over nodes to see tooltips. Click nodes to open detailed properties.
What to look for in the pipeline:
- Checkpoint Loader node - it must point to a loaded model.
- Prompt nodes - positive and negative areas for textual input.
- Sampler node - where you configure steps, sampler type, seed.
- Output / Save node - how images are written to disk.
Stage 3 - Install and select a model (automatic and manual)
A model checkpoint is the neural network that generates images. ComfyUI itself does not include checkpoints; you must provide one.
Option A - ComfyUI Manager (recommended):
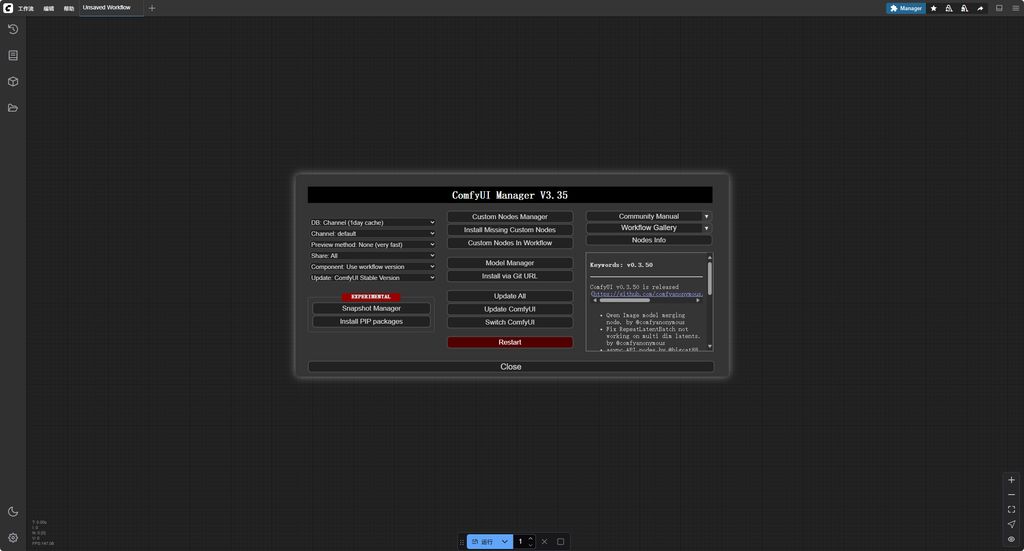
- Press Ctrl + Shift + M in the ComfyUI UI to open the Manager.
- Go to the Models section.
- Search for a model name (for example v1-5-pruned-emaonly or realistic-vision) or browse categories.
- Click Download. The Manager will place the checkpoint in ComfyUI/models/checkpoints and register it automatically.
- Return to the Checkpoint Loader node and select the model from the dropdown.
Option B - Manual install:
- Download a .safetensors or .ckpt file from a reputable model host (CivitAI, Hugging Face).
- Copy the file into the ComfyUI folder path:
- ComfyUI/models/checkpoints/
- ComfyUI/models/checkpoints/
- Restart ComfyUI if necessary.
- In the Checkpoint Loader node, choose your newly added model.
Tips:
- Use .safetensors when available - they are safer for tooling.
- Keep multiple models organized in subfolders if you manage many.
- If the Manager fails due to connectivity issues, switch to manual install.
Stage 4 - Configure the workflow nodes in detail
Once your model is loaded, you need to configure the key nodes. I’ll explain the important settings and recommended values for a beginner-friendly balance between quality and speed.
Checkpoint Loader:
- Choose the model checkpoint you installed.
- Some nodes allow you to set a base precision (fp16 is common for speed and lower VRAM usage).
Positive Prompt Node:
- Enter the main descriptive sentence that captures subject, style, and mood.
- Example: a beautiful landscape, mountains, golden sunset, cinematic lighting, ultra-detailed
- You can include style tags such as photorealistic, digital painting, anime, or artists’ names - but avoid copyrighted prompts unless you know the policy.
Negative Prompt Node:
- List visual artifacts or unwanted features: blurry, deformed hands, noisy, low detail, watermark
- Negative prompts help steer the model away from common failure modes.
Sampler Node:
- Sampler type: Euler a, DPM++ 2M Karras, or DDIM are common choices.
- Steps: 20-50 is reasonable. Lower steps are faster but may lose detail. I usually start at 28 and adjust.
- CFG scale: 6-12. Higher values make outputs more faithful to the prompt; lower values increase randomness.
Seed:
- Choose a seed for reproducibility. If you want varied outputs, use random by default. To recreate a specific output later, use the recorded seed.
Size and aspect:
- Set image width and height in the sampler or size node. Start at 512x512 or 768x768 for reasonable speed.
Output Node:
- Set filename template and save location.
- Choose output format: PNG for general use, PNG+metadata option to embed workflow and prompts for later reproduction.
Stage 5 - Prompt engineering essentials
Effective prompts improve output quality. Here are pragmatic tips for beginners:
- Structure: Subject - Style - Lighting - Detail
- Example: an astronaut riding a horse, cinematic, golden hour lighting, 8k, ultra detailed
- Example: an astronaut riding a horse, cinematic, golden hour lighting, 8k, ultra detailed
- Use commas to separate concepts.
- Add technical qualifiers: high detail, sharp focus, photorealistic.
- Avoid vague adjectives alone - "beautiful" helps but pair it with specifics.
- Negative prompt is as important as positive prompt for avoiding artifacts.
- If you want consistent composition, use ControlNet with a reference image or pose.
Stage 6 - Run and monitor a generation
Now you are ready to run.
- Verify connections: Checkpoint -> Prompt -> Sampler -> Output must be connected.
- Press Queue Prompt or use the key combo Ctrl + Enter to start the job.
- Watch the log panel for progress. The sampler will iterate step by step.
- After the final step, the output preview updates with the rendered image.
- Right-click the preview or use the Output node controls to save the file.
Time expectations:
- Cloud RTX 4090: 5-12 seconds for 768x768 depending on sampler and steps.
- Local RTX 3060: 15-45 seconds for 512x512 depending on settings.
- CPU-only: minutes per image, not recommended.
Stage 7 - Saving and reproducing results
To reproduce and share workflows and results:
- Save the workflow JSON: File -> Save workflow. Share the .json file so others can load the exact pipeline.
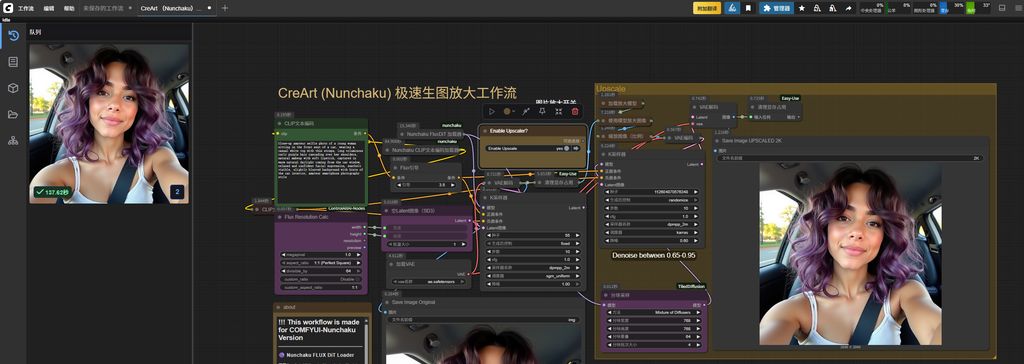
- Save images with metadata: choose PNG with embedded metadata. This allows ComfyUI to extract the workflow and settings from the PNG later.
- Record the seed, model name, steps, sampler, and CFG scale in your notes if you need exact reproduction.
Stage 8 - Common extensions and how to add them
ControlNet:
- Use ControlNet to guide pose, edges, or depth.
- Add a ControlNet node and connect it before or alongside the sampler so conditioning affects generation.
- Provide a reference image or edge map as input.
LoRA:
- LoRA files are lightweight adapters that tweak style and content.
- Save LoRA .safetensors into models/loras/.
- Add a LoRA loader node and connect it to conditioning or checkpoint nodes.
- Adjust LoRA weight to control influence (0.3-1.0 typical range).
Upscalers:
- Add an upscaling node if you need larger output for printing or client delivery.
- Popular upscalers include ESRGAN variants or AI upscalers in the plugin ecosystem.
Inpainting:
- Use mask input nodes to designate areas to be regenerated.
- Provide base image and mask; the pipeline can perform targeted edits while preserving the rest.
Stage 9 - Batch generation and experiments
Batch generation:
- Increase batch size in the sampler node to produce multiple variants in one run.
- Use variations in seed or prompt lists to explore different directions quickly.
Parameter sweeps:
- Run a parameter sweep by scripting or using multiple queued workflows with systematic changes in steps, CFG, or LoRA weights.
- Save results to a labeled folder for rapid comparison.
Troubleshooting - Extended guide
Below are frequent problems and practical fixes.
Problem: Checkpoint shows "null"
- Confirm the file is in models/checkpoints/.
- Restart ComfyUI so it rescans the folder.
- Verify file extension .safetensors or .ckpt.
- Check file permissions on Linux/macOS.
Problem: CUDA out of memory (OOM)
- Lower image resolution.
- Reduce batch size to 1.
- Use model precision fp16 if not enabled.
- Try memory saver nodes or offload features if supported.
- Close other GPU-intensive applications.
Problem: Black or corrupted images
- Check sampler connections and that the sampler node is connected to output.
- Try a different sampler type.
- Ensure model successfully loaded - sometimes a corrupted checkpoint yields garbage.
Problem: Very slow generation
- Use fewer steps or a faster sampler.
- Switch to a cloud GPU for heavy work.
- Ensure GPU drivers and CUDA versions are up to date.
Problem: Unexpected artifacts (extra limbs, distorted faces)
- Improve negative prompts (explicitly exclude "extra limbs", "bad anatomy").
- Use ControlNet or reference images to constrain composition.
- Reduce CFG scale slightly to allow more creative outputs, or increase if the prompt needs to be strictly followed.
Advanced techniques and workflow automation
Once you are comfortable with basic generation, these techniques help create production-ready pipelines.
- Workflow libraries and templates
- Create reusable workflow templates for e-commerce product shots, portraits, or background generation.
- Store templates with descriptive names and version numbers.
- Create reusable workflow templates for e-commerce product shots, portraits, or background generation.
- Automation and CI-style rendering
- Use a remote render queue: push JSON workflows to a cloud server and have a worker process them in order.
- Useful for nightly renders or batch transformations.
- Use a remote render queue: push JSON workflows to a cloud server and have a worker process them in order.
- Integration with creative apps
- Export images to a dedicated cloud folder and use Photoshop batch actions for post-processing.
- Use connectors or scripts to move assets to Blender or After Effects for compositing.
- Export images to a dedicated cloud folder and use Photoshop batch actions for post-processing.
- Quality control with metric checks
- Add automated checks for image resolution, file size, and detectable artifacts (using image analysis scripts) before delivering to clients.
- Add automated checks for image resolution, file size, and detectable artifacts (using image analysis scripts) before delivering to clients.
- Collaborative workflows
- Share workflows with teammates and assign ownership of model versions and LoRA packs.
- Keep a changelog when you tweak nodes in shared templates.
- Share workflows with teammates and assign ownership of model versions and LoRA packs.
How I tested ComfyUI - methodology
To evaluate options I ran the same workflow across:
- Local RTX 3060 laptop
- Local RTX 4090 desktop
- Cloud RTX 4090 instance
Test setup:
- Scene: 3-person photo stylized into an anime-like illustration (stress test for pose and detail)
- Resolution: 768x768
- Pipeline: checkpoint -> positive/negative prompts -> ControlNet (pose) -> LoRA style -> sampler -> output
- Metrics collected: setup time, iterations per hour, average render time, reproducibility, cost per batch on cloud
Scoring rubric (1-10):
- Ease of use
- Accuracy (output matching prompt)
- Speed (time per render)
- Scalability (batch and high-res)
- Cost efficiency
Results summary:
- Cloud RTX 4090 scored highest for speed and scalability.
- Local RTX 4090 offered the best cost efficiency for heavy regular use.
- Local RTX 3060 was good for learning but limited for production.
Market landscape and short predictions
Key trends:
- Cloud usage continues to rise - many creators prefer renting GPU time rather than upfront hardware investment.
- Node-based UIs like ComfyUI become standard for advanced workflows and enterprise pipelines.
- Workflow sharing marketplaces will expand - expect paid templates specialized for ads, e-commerce, and character art.
- Tight integration with video tools and real-time streaming is emerging - ComfyUI nodes are being adapted to frame-by-frame pipelines.
- More LoRA marketplaces and curated model bundles appear, making style switching faster and safer.
Final takeaway and quick decision guide
ComfyUI is worth the effort if you want control, reproducibility, and the ability to build advanced pipelines. Beginners should start with cloud images that come preconfigured. Power users and teams will benefit from local or hybrid setups to manage costs and data residency.
Decision guide:
- Hobbyist learning fast: Cloud or portable build
- Professional artist: Local 4090 or high-VRAM GPU
- Agency batch work: Cloud with orchestration
- Developer tinkering: Local install for scripting and custom nodes
- Startup team: Hybrid approach to balance cost and scale
Quick decision matrix
Use case | Best method | Why |
Hobbyist learning | Cloud | No setup, quick iteration |
Professional artist | Local (4090) | Control, privacy, high throughput |
Agency batch work | Cloud/Hybrid | Scale for campaigns |
Developer tinkering | Local | Custom nodes and scripting |
Startup team | Hybrid | Cost + flexibility |
FAQ
Do I need coding knowledge to use ComfyUI?
- No. ComfyUI is visual and many workflows are drag-and-drop. For advanced automation, basic scripting helps.
Is ComfyUI better than Stable Diffusion WebUI?
- It depends on your goals. WebUI is simpler for prompt-only workflows. ComfyUI offers deeper control for complex pipelines.
How much does it cost to use ComfyUI?
- Software is free. Costs come from GPUs - cloud instances typically range from ~$0.60 to $1.20 per GPU-hour depending on provider and GPU model.
Can I share my workflows with others?
- Yes. Save workflows as JSON files or embed workflows in PNG metadata and share them.
Which GPU should I choose?
- Minimum useful GPU: RTX 3060 with 6 GB VRAM for learning. Recommended for professional work: RTX 4090 with 24 GB VRAM or equivalent.
Where can I get prebuilt cloud images?
- Providers like the one referenced previously (console.suanli.cn/server) offer ComfyUI images pre-configured. Check your preferred cloud vendor for ComfyUI templates.
Next steps
- If you want the easiest start, spin up a cloud ComfyUI image and load the Basic Text-to-Image workflow. Use ComfyUI Manager to download a single reliable checkpoint (v1-5 or a modern equivalent). Try the example prompts in this guide and tweak CFG and steps to learn their effects.
- Once you’re comfortable, experiment with ControlNet, LoRA, and batch rendering.
- Save your workflows and share them with the community to learn from others’ pipelines.


