Guide to FLUX.1 Kontext: AI Image Editing and Prompt Tutorial


AI image editing just took a huge leap forward with FLUX.1 Kontext - a new model that brings natural language instruction to the world of photo editing. Instead of tweaking masks, stacking prompts, or regenerating entire scenes, you can now simply say what you want changed and the model does exactly that - nothing more, nothing less.
This guide will walk you through exactly what FLUX.1 Kontext is, how it works, what makes it different from traditional models, and how to get the most out of it using clear, simple instructions. Whether you’re a designer, developer, or creative explorer, FLUX.1 Kontext unlocks new precision in generative editing.
What is FLUX.1 Kontext?
Think of traditional AI image generation like commissioning a brand new painting. You provide a prompt, the model starts from a blank canvas, and the result is built from scratch - often with lots of surprises.
FLUX.1 Kontext flips that model. Instead of asking the AI to create something new, you give it an existing image and a targeted instruction like “change the shirt color to blue” or “remove the person in the background.”
The magic? It changes only what you asked for, preserving everything else.
Before this model, we had two main ways to edit with AI:
- Image-to-Image Generation: You input an image and a prompt, but the model would often reimagine the whole scene, not just the part you wanted to change. You’d lose details or get inconsistent results.
- Inpainting: You masked the area you wanted to change and wrote a new prompt - but even then, results were limited and patchy. The boundary between new and old content was rarely seamless.
FLUX.1 Kontext introduces true instruction-based image editing. It reads the original image and your command, understands what to change and where, and updates only the requested detail. The result is context-aware, visually cohesive, and surgically precise.
It’s the difference between “make something new” and “fix just this part.”
Versions of FLUX.1 Kontext
FLUX.1 Kontext comes in three variants:
- Kontext [max] - highest quality, commercial API access
- Kontext [pro] - optimized for speed and deployment
- Kontext [dev] - open weights for research and experimentation
If you're running your own instance or building custom workflows in ComfyUI or similar platforms, [dev] is your go-to. For production-level tools and scalability, [max] and [pro] are served via partnered API providers like Runway and Runware.
Why FLUX.1 Kontext Stands Out
What makes this model different from others?
- Natural Language Understanding: You don’t need to re-describe the image. Just write, “make the car red” or “blur the logo.” Kontext will understand the target and the instruction.
- Minimal Change: It doesn’t invent a new scene - it edits only what’s asked for, preserving composition, lighting, and tone.
- No Masking Required: Unlike inpainting, you don’t need to manually select areas. The instruction alone is enough.
- Consistency and Context: Since it sees the whole image and interprets commands semantically, edits blend seamlessly with existing content.

How to Use FLUX.1 Kontext
Here’s a easy step-by-step overview for using FLUX.1 Kontext:
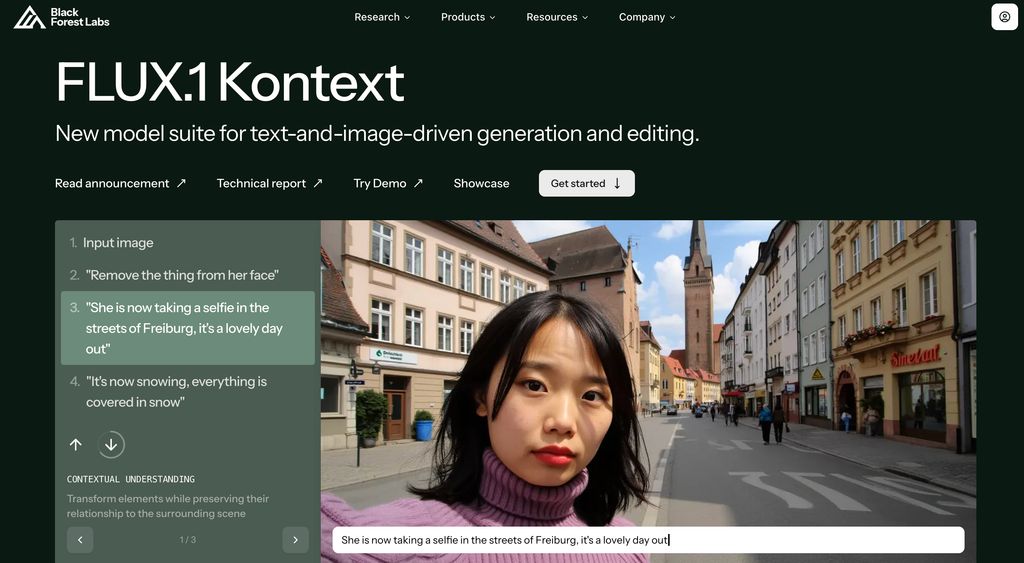
Step 1: Sign up Black Forest Lab
Their landing page is automatically FLUX.1 Kontext model right now, as it was just released. When you sign up, you’ll receive 200 free credits to get started.
Step 2: Prepare Your Input Image
Make sure you have a clear, high-quality image. This can be a JPEG or PNG. The more detailed and well-lit the original, the better the result.
For example - below is mine:

Step 3: Write a Natural Instruction
Use simple, clear instructions like:
- “Remove the man in the background.”
- “Change the building color to blue.”
- “Add a cloud to the sky.”
- “Replace the logo with a mountain icon.”
It works best when the task is:
- Specific (not too vague)
- Actionable (clearly describes what to do)
- Contextual (refers to visible elements in the image)

Step 4: Generate and Export
Click Run. You’ll get an edited image that reflects your command. Compare with the original - only the requested change should be visible. Export or feed the output into your next node (for style transfer, upscaling, or post-processing).

Prompt Examples for FLUX.1 Kontext
Here are some sample edits that work well:
Task | Instruction |
|---|---|
Object removal | “Remove the lamp post on the left.” |
Color swap | “Change the shirt to green.” |
Text update | “Replace the sign text with ‘Welcome.’” |
Element replace | “Replace the flowers with rocks.” |
Blur or censor | “Blur the person’s face.” |
Logo swap | “Remove the Nike logo.” |
Limitations & Tips
While FLUX.1 Kontext is powerful, here are a few things to keep in mind:
- It doesn’t work well with vague prompts like “make it better” or “clean up.” Be specific.
- It performs best on well-lit, clear images.
- For very complex edits (like turning a building into a castle), image-to-image or ControlNet might still be better.
- Layering multiple edits may cause drift in style or quality. Try batching related instructions in one go.
Final Thoughts
FLUX.1 Kontext unlocks a new level of precision in AI image editing. You don’t need to be an artist, prompt engineer, or Photoshop wizard - just describe what you want to change, and the model handles it cleanly.
Whether you're prototyping visuals, editing brand assets, or building an internal tool, Kontext speeds up workflows and reduces the back-and-forth. And with open weights for experimentation, it's also a great playground for researchers and tinkerers.
Instruction-based editing isn’t just a feature - it’s a new phase in how we interact with visual AI.

